Monday, July 27, 2015

Kaleb's Monster Party - First Birthday Party Revealed


I would like to take a moment to mourn the loss of the days of my son officially being a baby. My baby boy has turned one and is no longer my baby. This birthday party marked the transition of my little boy becoming a toddler. I know I’m being silly, but you know I think I’m allowed to be silly from time to time.  He is now a toddler!
Ok. My sad boo who rant over.
My Baby is One! Yay.
When I first starting thinking about my son’s birthday party the first thing that came to mind was that I didn’t want this party to be over the top. There wasn’t really going to be many children at this party and I knew deep down that it would be all in vain. So the theme of the party was sweet simple and visually appealing for photos. I believe I pulled it off. Due to the results of this party I have been hired out by my niece to decorate her sweet sixteen party next February (don’t even want to think about her being that old).
This party marked not only the changes that may little man has mad over the last year, but marketed the growth of his momma. That's right after witnessing what accomplishments could be made by trusting your friends and relinquishing control over everything. I had help from friends on this party. So I have to thank Amanda and Jessica. I love you both!
Decorations! Yay I had a lot of fun getting ides for and making all the decorations. I took several different ideas that I found and kind of meshed them all together. My lovely Amanda did an amazing job on our front door to Kaleb's birthday party. She seems to think that she doesn't "craft" well, but she did an amazing job here. Be proud Amanda, be proud.


I saw a lot of different adorable ideas for kids goodies to give away at the party, but since we were going with a pool party option I thought beach balls would be a great option. I also went with an alternative of bubbles as well because face it who doesn't love bubbles.


 There were several different birthday banner ideas that I loved, but I found that I wanted to combine the standard triangle banner with monster puff balls. I have to say the puff monsters were so easy to make and were super cute! It would be a fun project to take on when Kaleb gets a little bigger.


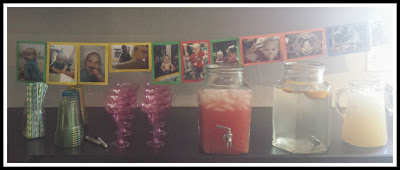
I decided to follow up the triangle monster banner with a timeline banner that is made up pictures of Kaleb. It was a great way to show how much he has grown. Sniff Sniff. This was a big hit at the party, and I apparently take a lot of pictures of my son. 


We attempted to have a photo booth area for people to take silly pictures with Kaleb. It turned out really well I think with these super easy monster fans. However; overall it didn't turn out as well as we hoped.  Well it wasn't used like we hoped. I only had one picture taken and it was blurry due to host error in setting up the camera?! Fail. It did make for a cute seating area and care seat resting spot. 


I stumbled across this idea of decorating your French doors and giant legos. I couldn't resist. I have to say for something that was so easy it really made a big impact on the décor. Who knew? Plastic table covers and paper plates are great decorations. 


On to the Food! One word people. ADORABLE!


My girl Jessica did an amazing job at making Kaleb's smash cake. I say that she makes adorable monster's wouldn't you say.

I love food, and I love to cook. However; when it comes to parties I always seem to run out of time. So this year I decided to outsource some of my work. We semi catered this party to Cardenas where we bought makings for our taco bar.


Since our son had his adorable monster cake we had a desert bar for everyone else.


Cookies, Brownies and Cupcakes people! I found the most delicious recipe for Dark Chocolate Cupcakes and super addictive peanut butter frosting (post will follow as soon hopefully). I'm a huge fan of cake and frosting, but I don't like mine sweet so this was the perfect frosting possible. Just think peanut butter cup.


Overall I had a wonderful time preparing for this party and am looking forward to more parties and family fun!


Thursday, July 23, 2015

[Mid-Week Snack] Zucchini Butter … not just another veggie snack


We have a saying here in the Koenig household, “Bread is just a delivery device for butter”. It isn’t the healthiest of sayings, but it is delicious mmm. We have a great love of food and the many forms that it comes in. As time slips by I have grown fonder of exploring healthier options to incorporate into our less than perfect diet. In regards to my husband he does prefer those of the more desert related forms, don’t we all.

So imagine my surprise when I was able to expand my knowledge of a family favorite. Now I know of several different butters: Peanut butter, almond butter, apple butter, cookie butter and now Zucchini butter. What?! Zucchini butter. That’s right you heard me right.

I know it sounds strange and trust me there was a definite eyebrow raise when I stumbled across this gem. I was slightly hesitant about this newfangled idea of a vegetable butter. However; I figured I have a lot of zucchini sitting in my fridge ready to be disposed of if I didn’t figure something to do with it. What did I have to lose? Nothing! I did, however, have a lot to gain.

I will have to say that this was seriously an easy recipe as I expected that I would burn it. Between the water in the zucchini and the butter that was near to impossible. The zucchini didn’t start to caramelize and stick to the pan until it had been simmering for close to a half hour. You will want to flip it occasional.

The steps are simple.

1. Grate the zucchini and drain the water.


 2. Heat up your butter or olive oil, I used butter since we are lovers of the stuff, with your garlic or shallots into a sauté.
 

 3. Add your grated zucchini

 4. Toss occasionally


 And enjoy!


I would like to say thank you to the Kitchn and your wonderful food ideas. I will be visiting you often for more ideas to bring to my table.

What do you like to snack on?  


Monday, July 20, 2015

Blogging Learning Curve

Have you ever felt like if you didn’t ever just start on something than you never would? Well, that was the case for me when it came to this blog. It all started way back in 2009 after seeing “Julie and Julia”. I know that movie was a catalyst for many people who thought, “Hey I can do that”. It isn’t as easy as that though. You can’t just sitting down and BOOM you have a blog. 5 years later still no blog. I stumbled across a post on Pinterest from one of my friends who started a blog, and that was that.  I decided to take the plunge, finally.  I started. I didn't want to think to much about the details afraid that I would just talk myself out of it.

I asked myself one question. Umm what platform do I use for the blog? There were so many options out there it was daunting.
 
In the end I decided to go with Google Blogger, as you can see, since I love all that is Google. I started tinkering with the layout and templates. Not really in love with any of the templates, but I decided I would fix that later. I wanted to get my first blog published. After many headaches over what to call my blog and where to start I published my first post, Giant Ruler Growth Chart! I have to say I loved every second of creating that post. I caught the bug!
 Time past and the posts continued… slowly. Now almost one year later with minimal posts, and my template still the same, it is time to work on my dream.  This is my dream a dream to write.

The process of a face lift to my blog has begun a NEW BLOG DESIGN! Yay! 

I decided that I would start with doing some reading on other bloggers suggestion of what to do. I quickly found that basically that I want to make my blog be visually appealing, but not too crazy. Basically, I need to dress it up like my blog is going out for a night on the town. Dress it up my way, Koenig style. 


I than began to move onto different options for template providers. There are several out there that have a lot of wonderful options available.
  • wix.com
  • mybloggerthemes.com
  • designscrazed.org
  • themexpose.com

I found a couple designs that I fell in love with. After following the instructions provided I previewed my blog and Bam! It looked like their blog and still wasn’t what I was looking for. I couldn’t quite figure out what it was that I wanted my blog to be. Aside from it being me and not them (to be honest I still don’t think my blog is right). So back to the drawing board!
It was at this point I decided that I needed to use my knowledge about programming and bring it into the practical world. I decided that I needed to use Blogger for all that it was worth and tweek it, make it me.  

I adjusted the background, width, layout all the usually things that people change on their platform. Still it wasn’t right. I knew I needed something that was a tiny bit me so my header is what I decided to do.

There are some people that would say that I’m an artist, and that I have a gift. I wouldn’t say I disagree, but more like I think everyone has it in them to be an artist. I think that we are just scared to put ourselves on a canvas. I have a signature in a way, my bird. I created this bird several years ago and he seems to keep sneaking into my work. I only felt it was appropriate to incorporate him with my blog since he is my style, and should stay with me.
Just one of his appearances
 
The header is up, not finished, but up! My husband, the photo editing guru, wants to show me a couple tricks to upgrade the image. My blog is like me, organic. I believe it will change with me. I don’t know if it will ever be just right, but I think that is because it is a reflection of me. Something I love, but feel that can be improved somehow.
 
Where we started... most likely not the end!


Thursday, July 16, 2015

[Mid-Week Snack] Fruit Ice Cubes

Summer time in Vegas means drink your water people

Happy mid-week everybody! Let me just say that last weekend was amazing. This was a weekend filled with friends and family coming together to celebrate the joyyace occasion of the First Birthday. Not just one though 2 First birthday, my son's and our good friends daughters. So you know what that means right. Cake! I had a lot of cake. I do plan on sharing the festivities with every (coming soon) pending my son allowing me to write.

However; I wanted to share a Mid-Week snack with you first. Just a little something quick simple and an absolute favorite of mine. I am a huge fan of water. I love the stuff. The taste, smell, texture and the feeling that I get after having a big glass of the stuff. When my husband and I go out to dinner he just tells the waiter to leave a pitcher with me to save themselves time.

Vegas can get hot. Me? I like the heat. I know that it is very important to stay hydrated during the summer months. Just imagine summertime sitting at the pool drinking water drinking juice drinking a margarita, but you skip the water because it doesn't taste as good. Well, I agree with you on this one. Margaritas are delicious.. um yum. So I have a little trick though I'd like to keep in my back pocket for when I have friends over. Fruit ice cubes.

Now it sounds simple enough and that is because it is. All you really need for this little trick is
  • water
  • fruit
  • some kind of ice tray or freezable container to make an ice cube.
The first thing to do after you decide what fruit you want to use is wash your fruit. The entire fruit is used with the ice cubes not just the juice. I am going to use oranges this time. I do love my citrus fruits. You could use anything. I have used strawberries and raspberries whatever you have around the house or a choice favorite.


Once you have washed your fruit you need to slice it up into portions that will fit into what containers you are using to make your ice cubes. I have these awesome silicon shapes that work wonderfully for this. They are nice and large in addition to adding a cute little flair of shapes.


Next place your fruit into the containers evenly. This will make it easier to fill and move into the freezer.

Fill the containers with water. I like to fill up to about an 1/4 - 1/8 below the rim of the containers. This makes it easier to move them without making a mess and it makes sure they don't expand to far in the freezer.


Place the trays in the freezer, and wait!

Now enjoy a lovely glass of fruit infused water.  You see as the water chills and the ice melts the flavor of your fruit infuses the water. I find it infuses the water much faster than placing fresh fruit into a pitcher.


Have a great summer everyone and remember stay hydrated.

Wednesday, July 8, 2015

[Mid-Week Snack] Cranberry Pomegranate Apple Slices!


Hello people! I’m very excited about this and I know that this might make me a little goofy, but food gets me excited. I love food, but food doesn’t reciprocate this love with me. So I am forced to moderate my food consumption and am constantly trying to think of delicious healthy snacks. I don’t know about you, but I have a tendency to draw a blank when it comes to healthy snacks. I am constantly resorting to the same old same old snacks. You know the ones fruits, veggies and the not exactly healthy granola. This is a serious issue in the Koenig household these days as I attempt to make snacks for our one year old. After having the same snack day after day everything is just so bland, but thanks to the brilliance of my husband I learned something new.


So this week I have a midweek snack to share! I don’t really have a catchy name for this so please feel free to share a good name for this creation. Right now I’m calling it my Cranberry pomegranate Apple or Yummy Apple pomberry delights. Like I said, work in progress.


This is a ridiculously easy snack that is becoming a big favorite for my 1 year old.


What do you need:
  • Apple
  • Knife / Apple corer / potato peeler
  • Cranberry Pomegranate juice 100% juice (or any berry juice of your choice)
  • Container for storage

1. First you want to wash and peel your apple. I like using a potato peeler because really it is just so much easier than using a paring knife. I don’t need to impress anyone. (Do I?)


2. Once you have peeled the apple you want to remove the core. I have an apple corer and love it. You could use a knife if you wish. There is no wrong way of doing this.


3. I like to slice the apple up into rings. This is a recent preference as I have been cutting up a lot of apples for my son. The apple is both pretty and practical. I can easily snap them in half making it so there are no large chunks to choke on.


4. Now that you have your apple all cut up you can put your apple slices into a container. Take the your juice and pour it into the container covering the apples. Put the cover on the container and refrigerate. It won’t take very long now. I only waited 5 minutes before taking a couple slices out to give to my son, but the longer they soak the dark color they turn. 


5. Once the apples have soaked to your preference of time you can separate the apples and juice.


Now you have Cranberry Pomegranate apple juice and flavored apples. A great snack to go with anything. In this case we had a peanut butter and jelly sandwich. mmmm love me some PB & J's.

Now I just need to remember this option when faced with what I want to have to snack on. What do you like to snack on?

Heart Melting Handprint Shirt for Dad


Father’s day has come and gone, and to be honest I dropped the ball. This Father’s day was supposed to be one that goes down in the books. This was our first Father’s day with our son Kaleb. I wanted to do something special and memorable, but this year we spent the day traveling back from Disney World. So I doubled my efforts and made his birthday just a little bit more special. I have discovered an absolutely adorable and EASY project to make for that special Dad.
 
This looks to be the beginning of many amazing projects thanks to Kim with A Spotted Pony. This hand print shirt is just so awe inspiring I like to think of it as the heart melting shirt.
 

This is such a wonderful idea that it can be taken to many different media forms not just a shirt. Think of it! You can do this to not just a shirt but cloth purses, backpacks, short or pants. Really the list of possible mother’s day, father’s day and grandparent gif's is endless.

Materials needed:
  • Paper and writing utensil
  • Bleach
  • Spray bottle (make sure it's clean you don't want to be mixing chemicals)
  • Contact paper or lint roller (for those of you who have a smaller shape to make)
  • Shirt (or any cloth based item you wish to use)
  • Child (can’t forget them)

Note: depending on the color of your item the bleach will react different.

The important thing to remember is that if you don’t have exactly what I suggest using  it doesn’t mean that you are out of luck. Improvise and get creative! Sometimes you have something could work that didn’t realize. The original how to I found on this suggested using contact paper, but since I was at a friend’s house and I already had a bunch at home (darn it) I decided to use something else, a lint roller.

1. First you will need to get a good trace drawing of your child’s hand print. Depending on the age or your little one this might be the hardest part of the project. My little one wasn't even one yet (he is now. They get big so fast.) so I had help in wrangling him I. It took several attempts and a quick hand, but we finally were able to get an outline of his hand. I added a little heart inside the hand print at this point. You could change that to anything. You could put a letter inside the hand instead like a "K" for Kaleb. This would be helpful if you had multiple kids and handprints on one shirt. After acquiring an adequate hand print cut it out.
 
2. I than re-traced the hand print onto the lint roller paper. I re-attached the paper to the outer page that came with the roller to be able to trace the image. I than pealed it off the paper to cut it out.  I will be honest cutting out the hand print on the lint roller paper wasn't exactly easy, but I think that had more to do with my scissors not being very sharp.

3. Once I had my hand print I stuck the and onto the shirt.

4. For the next step I went outside as to not make the house smell or accidentally give the carpet or furniture a new look. Draping the shirt over an old metal folding chair I used the spray bottle, filled with bleach, and sprayed the shirt over the hand. At this point it is all about an artistic eye. Spray as much or as little as you want. The bleach starts working right away.

5. From here you can leave the shirt to dry. However; I did not. I was making this shirt at a friend's house so I needed speed along the process. To make sure that the bleach didn't get on anything else I took the shirt to the sink and rinsed the shirt off (very carefully). Once the shirt was rinsed off I put it in the dryer.

Adorable! I have to say that I am in love with this project even more than I thought I would be. This is something I plan on doing yearly with Kaleb's hand getting bigger and bigger. What would you do with this project? Let me know. I'm always open for more ideas.

 
What a nerd!


Wednesday, July 1, 2015

1st Birthday Party Musing


OH MY! My baby is turning ONE! What is a Mommy to do? Umm throw a party of course. With all these parties that have been going on over the past several months I have clocked some serious time with my Pinterest account. But most recently I have been on over drive with party planning ideas for my boy. So what is the theme? Monsters! He is our little monster so I found it was most appropriate.
 

I wanted share with you all some of my musing thoughts and what to expect to see come later this month. 
 

I absolutely love love love this door! The idea came from Moma Say What ?!


And where will the infamous cake eating happen?
 
What about decorations? 


I mean who doesn't love Legos right! I love this creative twist for interior French doors.
 
 
 I am in love with this photo banner found on project nursery.
 

Kara has some adorable ideas at Kara's Party Ideas


I love the balloons. I have a couple members of my family who have a slight phobia so I need to steer clear or the walk ways but an adorable photo backdrop I think.

Can I just say that I’m very excited for all of this. I didn’t set out intending to be one of those moms who goes way too far for a party where the child has no idea what’s going on. Than I realized this party isn’t for him. It’s for ME! So for me I want a simple and adorable decorated party that will be fun for children of all ages.

Let the decorating begin!

Monday, June 22, 2015

What you think about when you can't sleep

Life is chaotic. This is something that i have known for sometime now, but constantly have a reawakening to. We surround ourselves with things that need to be done to fill our days so that we do not become bored with our lives. I find that my life is filled with a multitude of endless projects. Sometimes I love having all these projects at my disposal, and then there are times when I wish I didn't have such a busy life. This is a summer of events in the Koenig household.

                 April: Amanda's (best friend) Bachelorette party
                 May:  Amanda's Wedding
                 June:  Tommy's (little brother) wedding
                            Family trip to Disney World
                            Kaleb's First Birthday

Life is an adventure. Ride it for all its worth. 


Sunday, June 14, 2015

Downtown Las Vegas Bachelorette Party!

Late as usual. I'm beginning to see a trend with my writing timing. The last time that I wrote I spoke of the Bachelorette Party that I was planning for my favorite girl Amanda. Well, the party has come and gone and let me just say I thought it was a complete success.

I have to say I love the way everything turned out. As to be the responsible party goers for the evening I decided to get a room at the Golden Nugget in Downtown Las Vegas.  The Golden Nugget has recently been renovated and has amazing reviews. The room provided the perfect backdrop to a classic bachelorette party (haha classic is right!).


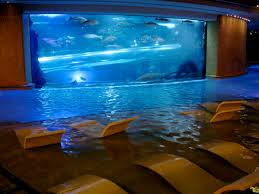
Really the reason that I wanted to stay at the Golden Nugget is this....  The ever famous shark slide at the Golden Nugget. I have lived in vegas my entire life and this people I was finally going to get to cross off on my to do list. 


SOOO the Decorations! I wanted something fun, but a little more on the classy side of things. I went with a silver, blue and white theme for Amanda. 


Bachelorette party Survival kits. Every girls must haves!


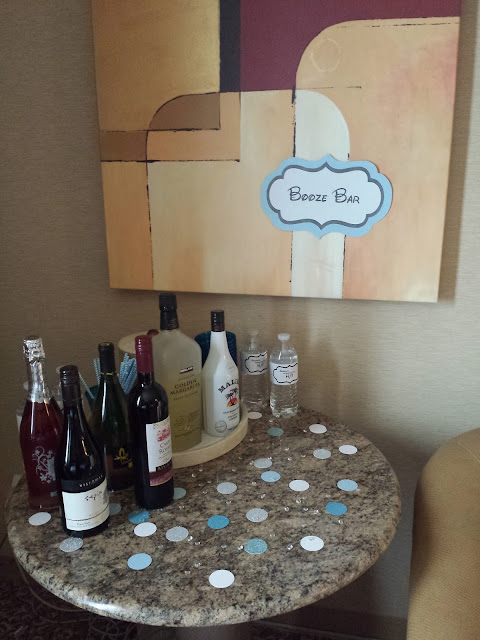
What is a bachelorette party without the booze people. Drinks in Vegas anywhere you go, especially the strip or downtown, are going to be overpriced. So to save a little money we are pre-gaming it. Welcome to the Booze Bar! A well stocked selection for every girls tastes.


Finally as promised. FOOD! I implied previously that food is a very important factor to my girl Amanda. As we were planning on hitting downtown Las Vegas for dinner I planned on only deserts and snack food to get us started. 
Welcome to Chocolate heaven. The process of this cupcake was an adventure let me tell you. 
Chocolate Stout Cupcake with a whiskey chocolate filling and mint irish cream cheese frosting. Let me start with. MMMMMMMMMMM. This cupcake was and is amazing. The only reason this cupcake fully came into existence though is my husband saved the day with the filling and frosting. There will eventually be a follow up post with the how to. Just another excuse to make some. 


Sometimes fruit is just as delicious as chocolate can be. Healthy eating but with a new historical twist. I love these banana hammock skewers. To be quit honest these were the biggest hit of the snacks.


Finally Twinkies! Not a snack for everyone I know, but sometimes you have to put a favorite out for the party girl. Twinkies are an all time favorite of Amandas. 


And of course to provide the much needed element of water. 


It was a night filled with fun and excitement. There are a lot of interesting people to meet Downtown.  We had the privilege of meeting the teenage mutant ninja turtles. 


All in All I had a blast! Love you Amanda!


Popular Posts